Noty.ai folders are collaboration spaces within your Noty.ai Workspace. You can create separate folders for various projects and teams. Add members to your folder and they will see all the conversations within this folder even if they didn’t participate. Additionally, Folders are a convenient tool to filter and manage your meeting transcripts. In this article, we will explain how to create and manage folders to improve productivity and collaboration.
What are folders?
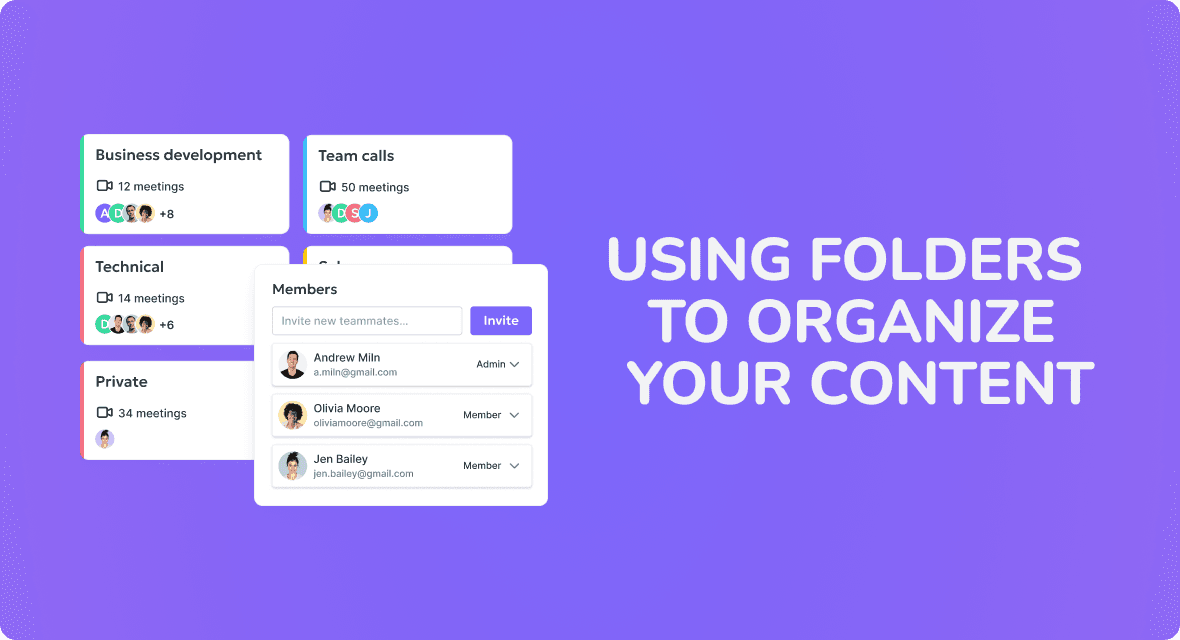
Use folders in Noty.ai for seamless collaboration and sharing of meeting transcripts. You can easily create unlimited folders and invite as many teammates as you need.
Types of folders
A transcript can be assigned to only one folder. If you move a transcript between folders, members may lose access to it unless they were part of the original meeting or conversation. In Noty.ai workspaces, there are two folder types:
Private - For conversations you wish to retain personally.
Shared - For conversations you'd like to make accessible to others.
Types of folder users
By default, you are the Admin of the folders you create. If you designate someone as a Folder Admin, you can only remove them from the folder by removing them from your entire Workspace. In Noty.ai workspaces, user roles are defined as:
Members - Can add their meeting recordings to specific folders and access other recordings within that folder.
Admins - Have the same access rights as members but with additional privileges. They can add or remove members from a folder.
Additional Information:
All Noty meeting transcripts initially have an 'Unassigned' status. You can later allocate them to specific folders.
Folders have no limit on the number of transcripts they can contain.
A single conversation can be designated to only one folder.
How to create and configure a Folder in Noty
There are two ways to create a Folder in Noty.
Log in to Noty.ai. In the left-side navigation, go to Settings and then access the Folders tab. Click Create a folder.
Alternatively, go to Dashboard, choose a meeting transcript with an Unclassified folder, and click the arrow to expand the drop-down menu. Click on + Create a new folder.
Managing folders in Noty.ai
When you create a new folder or modify an existing one, you have the following options:
Assign a new folder name and pick a new color for your folder
Add new members (people who can access and manage folder content)
Assign new admins to the folder
Manage the members
After adding someone to a folder, you can designate their role. Everyone is initially a Member, but you can easily promote them to Admin. To upgrade a member to Admin, click on the Member button and select Admin from the drop-down. Remember to click Save folder to confirm changes. Please note, this action is irreversible. To revoke the Admin role, you'd need to remove the user from the Workspace completely.
When adding multiple people at once, they'll all be given the Member role. If you prefer varying roles, adjust roles individually once they're in the folder.
Important:
If your invitee is a member of your Workspace, they will be able to access the Folder and its content immediately.
If your invitee has a Noty.ai account but they aren’t a member of your Workspace, they will be automatically added to your Workspace. Your folder will appear in their list of Workspace folders.
If you invite someone without a Noty.ai account, they'll receive an email with a link. They must follow this link and sign up to fully join your folder and Workspace as a Member. You can then assign them an Admin role, if needed.